Note: Manage (Create / Insert / Browse) metadata is accessible by editor profile only.
The Editor profile is given by the Administrator to a staff of the meteorological centre where the OpenWis portal is deployed.
The Editor has a thorough knowledge of the catalogue nomenclature and of the applied data policy.
His role is to manage metadata. He can:
![]() create
the metadata of a new product in the catalogue.
create
the metadata of a new product in the catalogue.
![]() insert
a new metadata record into the system from a metadata XML file.
insert
a new metadata record into the system from a metadata XML file.
![]() browse
its metadata:
browse
its metadata:
![]() duplicate
duplicate
![]() view
view
![]() edit
edit
![]() remove
remove
![]() export
export
This feature offers the possibility to create a new metadata record from an existing metadata template.
Each metadata item within OpenWIS requires a Unique Resource Name or (URN).
This is a globally unique identifier of the form:
urn:x-wmo:md: <authority> :: <unique identifier>
The authority and unique identifier of a URN depends on what the metadata item describes:
![]() For
datasets intended for global exchange, the authority will be "int.wmo.wis"
and the identifier will be the GTS «TTAAii» and «CCCC».
For
datasets intended for global exchange, the authority will be "int.wmo.wis"
and the identifier will be the GTS «TTAAii» and «CCCC».
![]() For
other datasets, the authority will be the reverse-DNS name of the dataset
provider and the identifier will be a locally-unique identifier.
For
other datasets, the authority will be the reverse-DNS name of the dataset
provider and the identifier will be a locally-unique identifier.
The full specification of URNs is described in WMO Core Metadata Profile v1-2 Guidance Document v0.1. (section A.1.2, page 40)
Along with a URN, each metadata item is associated with a category.
Categories partition the metadata within the catalogue according to the GISC that is responsible for publishing that piece of metadata.
At this point in time, it is not possible to change the category of a metadata item once it has been saved.
![]() On
My account page, select Metadata
service / Create metadata.
On
My account page, select Metadata
service / Create metadata.
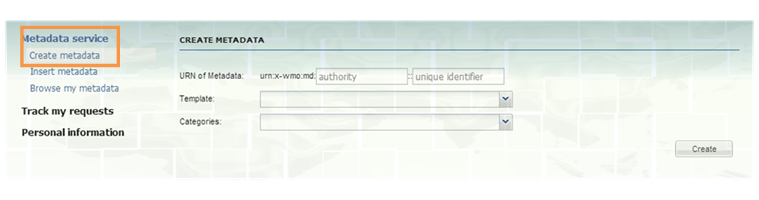
1. Set the authority and a unique identifier (in the scope of the given authority)
2. Choose a pre-defined Template.
Templates are pre-defined by administrators. The template initializes the metadata with pre-defined information and display instructions to fill in the metadata edition form.
3. Choose a Category.
Categories are pre-defined by administrators to classify metadata of the same type.
4. Click Create
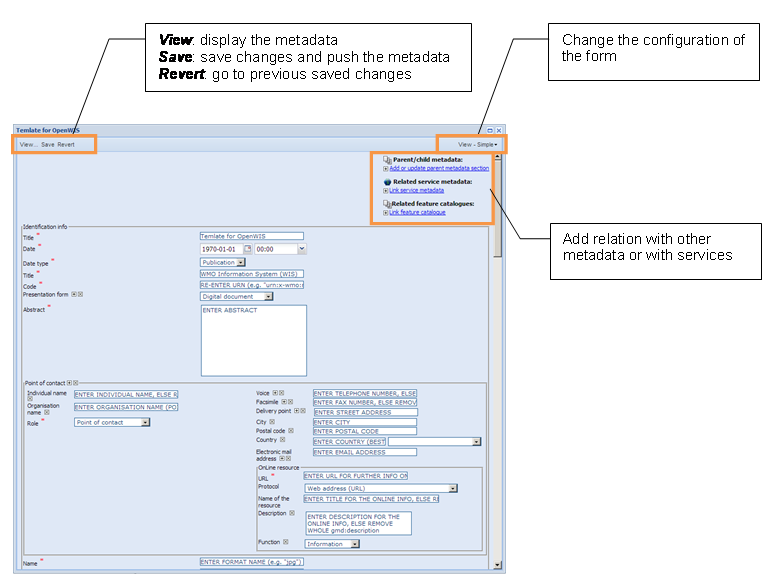
The metadata editor is then opened, allowing to edit the metadata content that has been initialized with the selected template.
5. Fill in the form as follows:
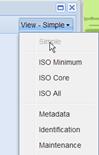
![]() The
set of metadata items displayed can be adjusted by selecting a different
configuration from the View menu top
right of the editor.
The
set of metadata items displayed can be adjusted by selecting a different
configuration from the View menu top
right of the editor.
![]() Clicking
the field label shows a brief description of the element.
Clicking
the field label shows a brief description of the element.
![]() The
default element value gives an indication of which value is expected.
You may need to scroll to the end of the field value for the full description:
The
default element value gives an indication of which value is expected.
You may need to scroll to the end of the field value for the full description:
![]()
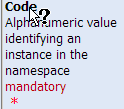
![]() Fields
marked with a red asterisk (*) must have a value.
Fields
marked with a red asterisk (*) must have a value.
![]() The
elements which can appear multiple times in a single metadata item have
a
The
elements which can appear multiple times in a single metadata item have
a ![]() icon
next to the label. Example of repeated element:
icon
next to the label. Example of repeated element:

![]() You
can reorder the repeated elements by using the
You
can reorder the repeated elements by using the ![]() icons
beside the labels
icons
beside the labels
![]() You
can remove an unnecessary element by clicking
You
can remove an unnecessary element by clicking ![]()
6. On the top left of the window, click Save.
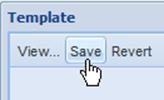
The metadata item is immediately pushed.
This feature offers the possibility to insert a metadata record into the system from an existing metadata XML file or from a Metadata Export Format (MEF) file.
![]() On
My account page, select Metadata
service / Insert metadata.
On
My account page, select Metadata
service / Insert metadata.
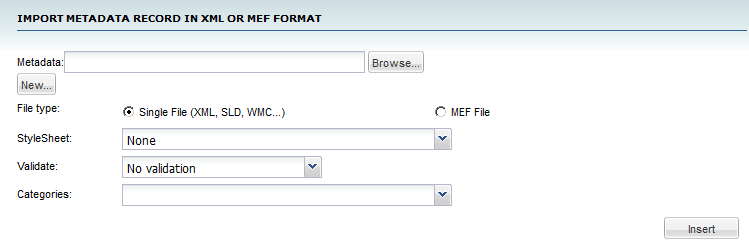
1. To select your local metadata, click Browse, and adapt the file type (single file or MEF File).
2. You can insert simultaneously several metadata by clicking New.

3. You can remove a file
by clicking ![]() .
.
Up to 10 metadata can be added at a time.
4. Select:
![]() the
style sheet: an XSL transformation will then be applied before inserting
the metadata
the
style sheet: an XSL transformation will then be applied before inserting
the metadata
![]() the
type of validation: None, XSD only or XSD and Schematron
the
type of validation: None, XSD only or XSD and Schematron
![]() the
metadata category in which the metadata will be assigned
the
metadata category in which the metadata will be assigned
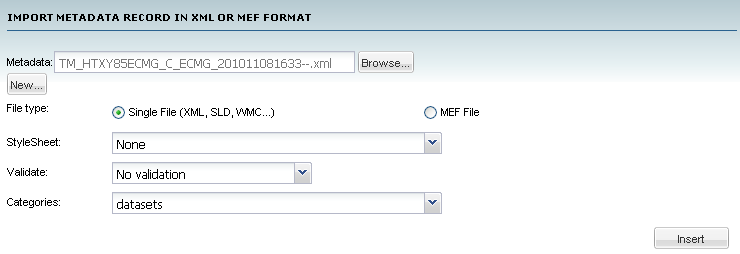
5. Click Insert to create the metadata.
At the end of import, a report is presented showing the number of success/failure and the list of metadata that have been created and the list of errors.

This feature offers a view of all the metadata created by the current connected user, and its extracted attributes.
![]() On
My account page, select Metadata
service / Browse my metadata.
On
My account page, select Metadata
service / Browse my metadata.
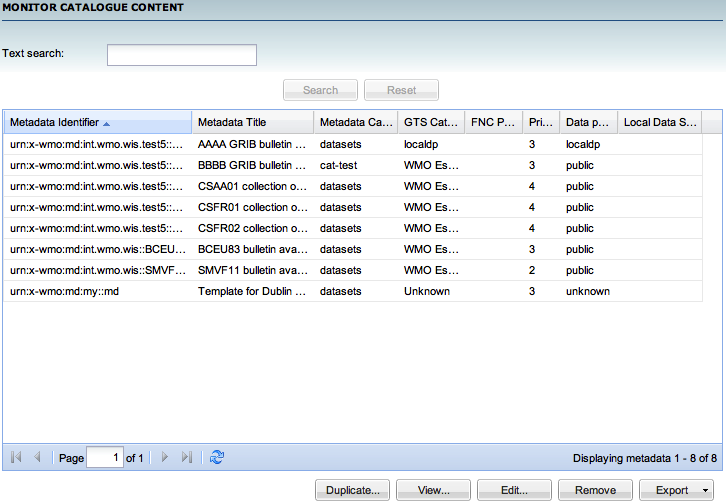
You can filter the metadata displayed by using the text search field.
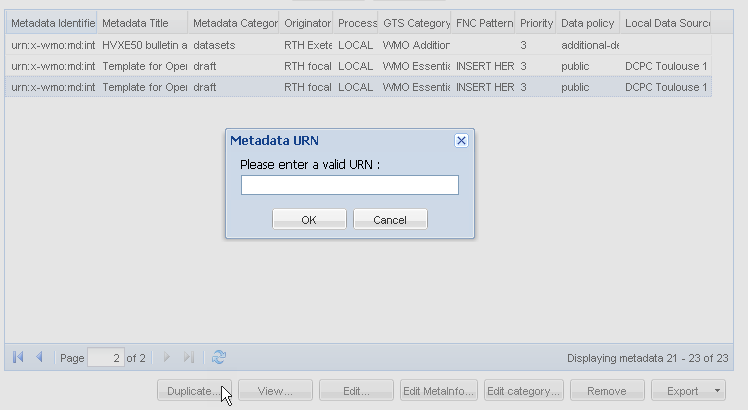
You can duplicate a selected metadata by clicking the Duplicate … button.
Just enter a valid and not used urn and confirm, the new metadata is created based on the selected one, and the metadata editor opens.
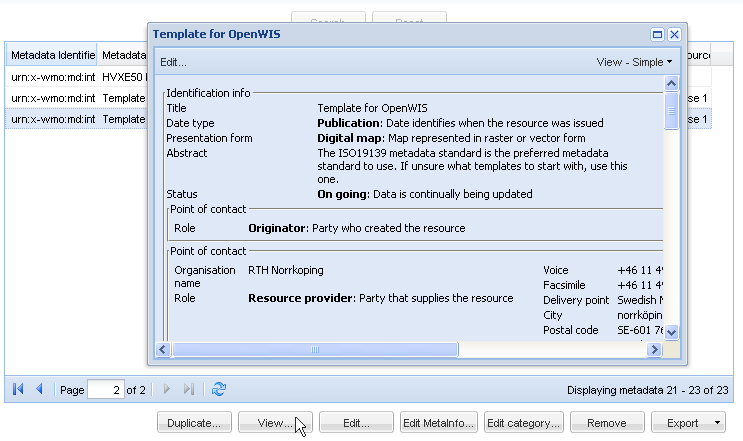
It’s possible to view the selected metadata by clicking the View… button.
The editor opens in viewing mode with all the metadata information.
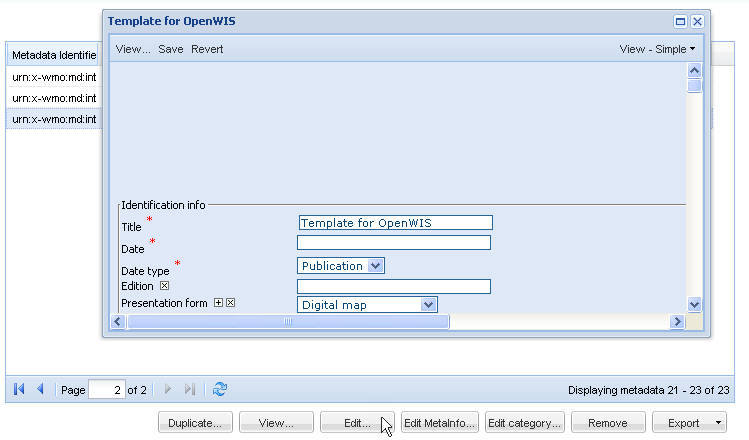
You can edit the metadata of your choice by clicking Edit… button.
The editor opens in edition mode with all the metadata information.
You can remove one or all the selected metadata by clicking the Remove button.
OpenWIS provides a metadata record export facility.
You can export metadata records selected in XML format, as WMO Core Profile 1.1 (conformant records, provided a conversion XSLT is available for the native profile of the harvested/imported metadata) or in Metadata Export Format (MEF).
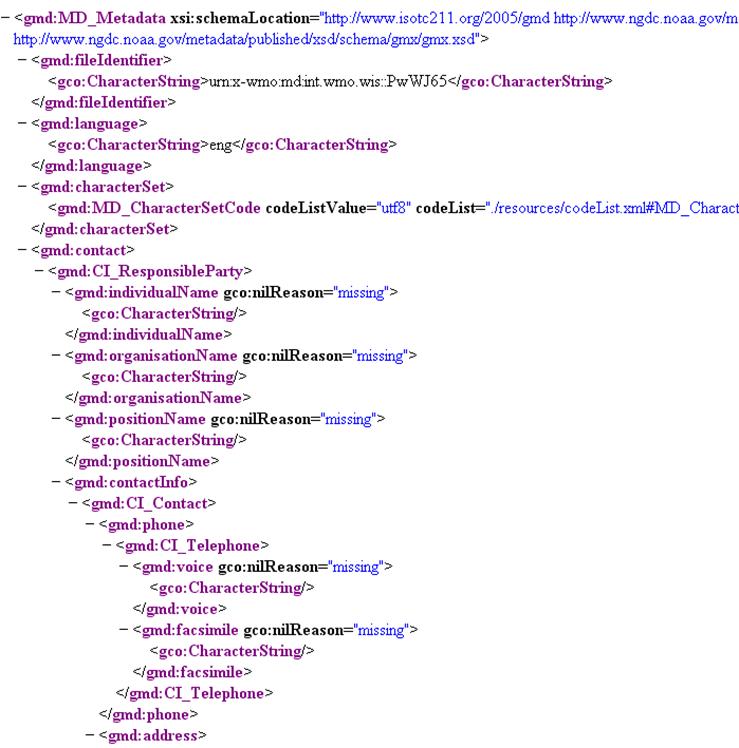
Select the metadata to export, click Export/As XML.
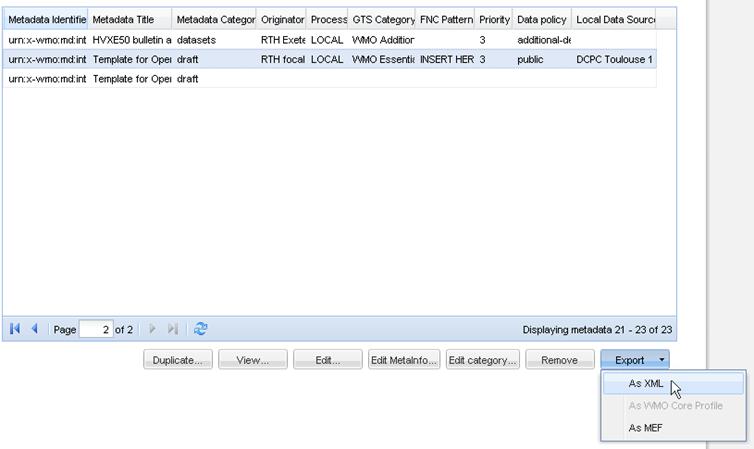
The XML file represented the metadata is displayed in another window of the navigator.
When available, this exports the selected metadata as WMO Core profile representation.
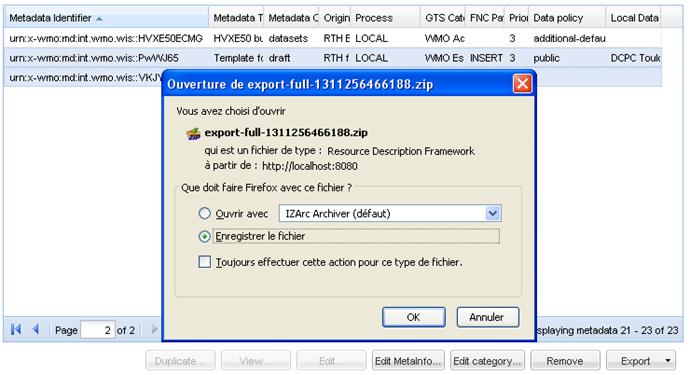
Select one or more metadata and click Export/As MEF.
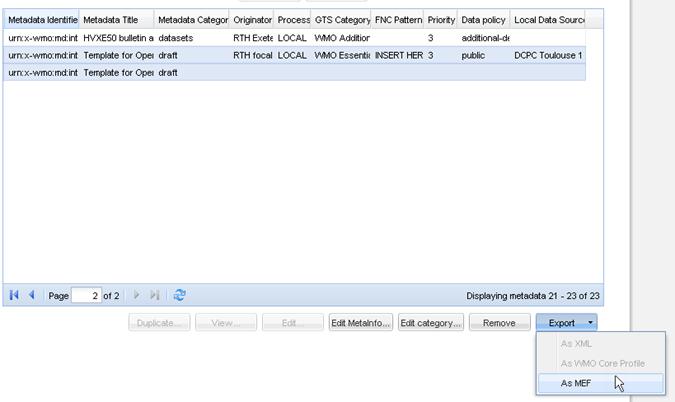
You can open or save the MEF file.